
Redefine print screen key
 DigitalBox
- System
- October 18, 2024
In case you have a keyboard without a "print screen" key (like Mac keyboard), it could be useful to redefine the key which will be used for your favorite screen capture.
Here is how to do this.
If - like me - you own a Mac keyboard, you will need to use two applications to attach the print screen to another key : the Screenshot app and the Shortcuts preferences app.
The Screenshot app is located below :
/boot/system/apps/Screenshot
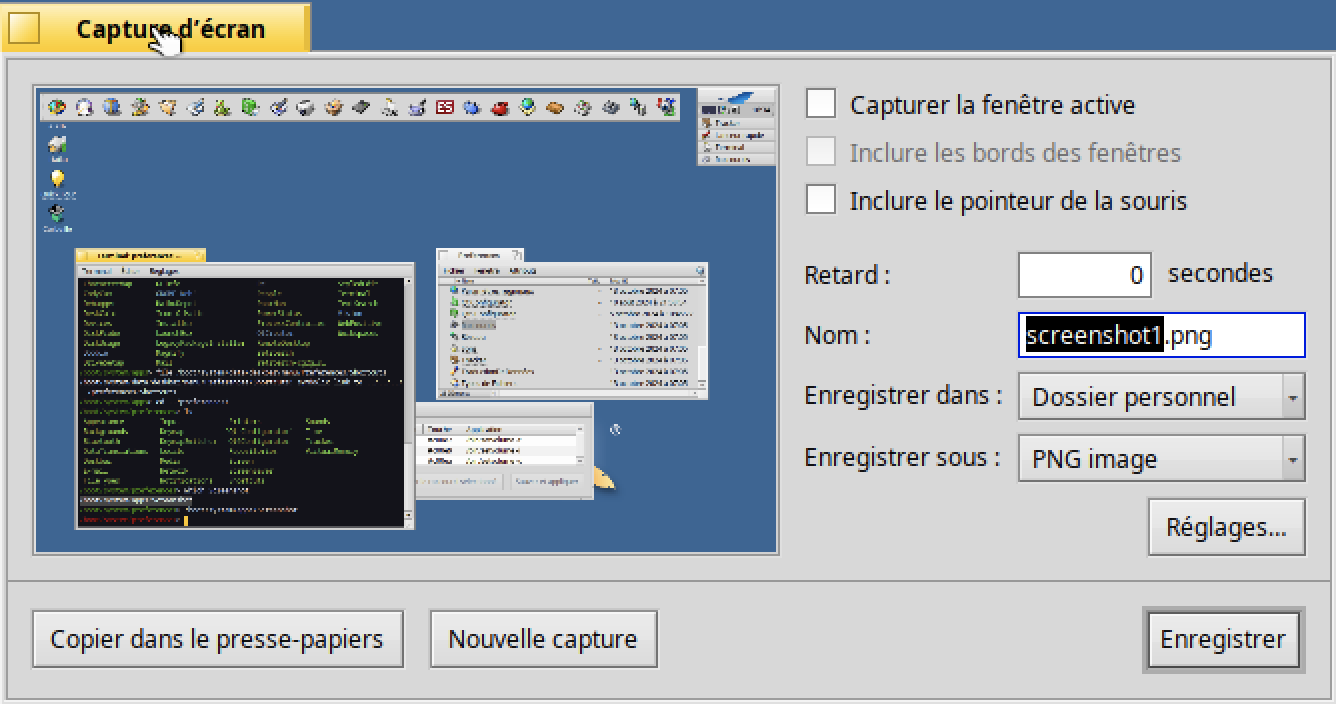
If you launch it via the Terminal, it will display the main window where you can choose to capture the whole screen or only the active window :
Ok now let's configure a key for the launching of the Screenshot app.
For that, click in the preferences menu on "Shortcuts" which is available with this icon :

It should open the below window where only volume shortcuts keys are defined :
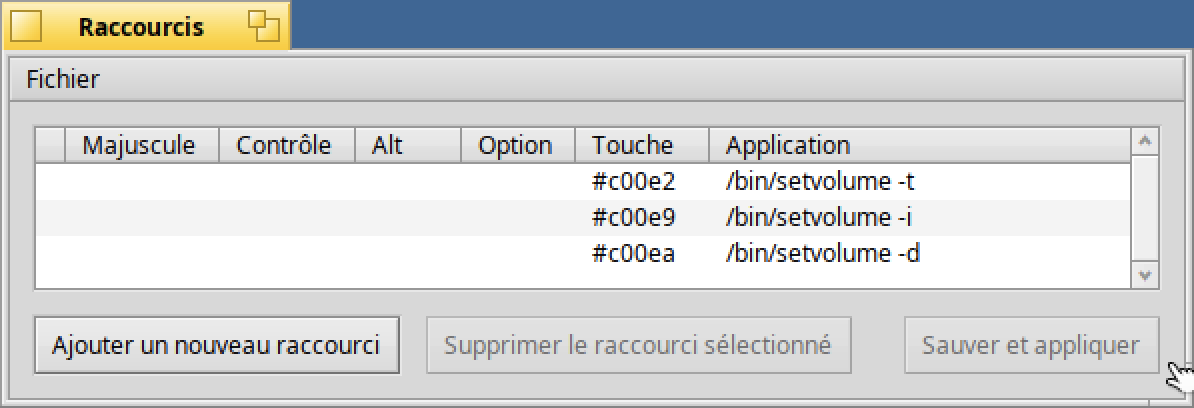
Ok now click on "Add a new shortcut" :
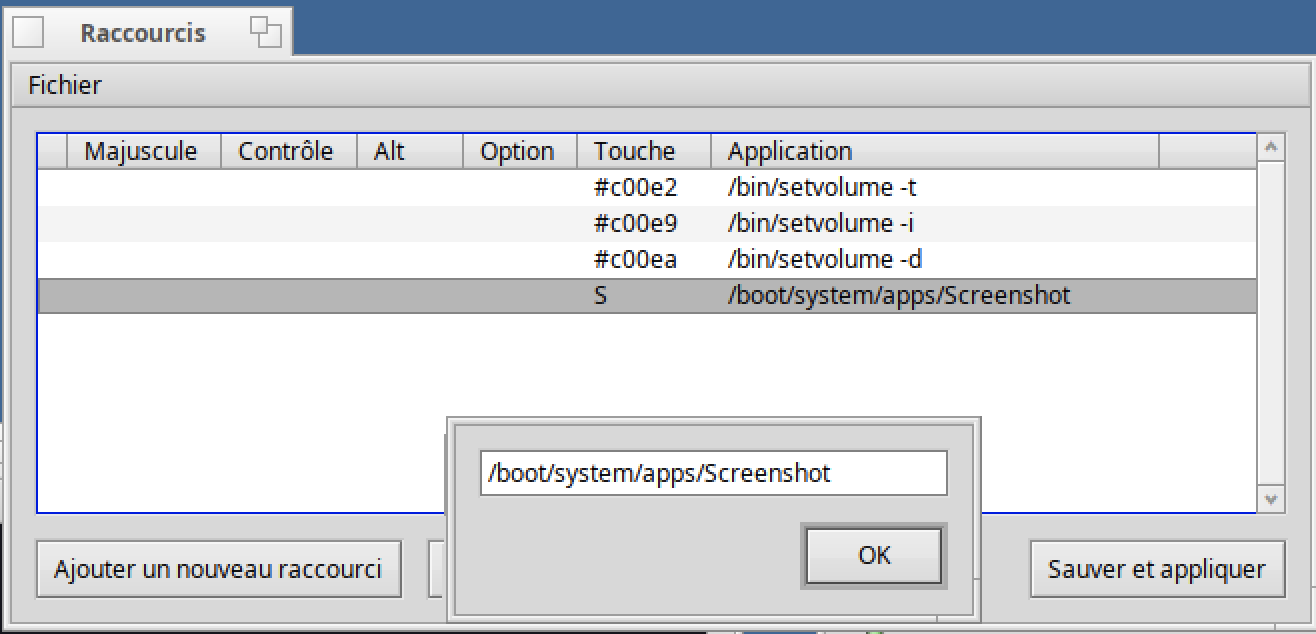
Then touch the desired shortcut key ("S" in my example) and indicate the application to launch :
/boot/system/apps/Screenshot
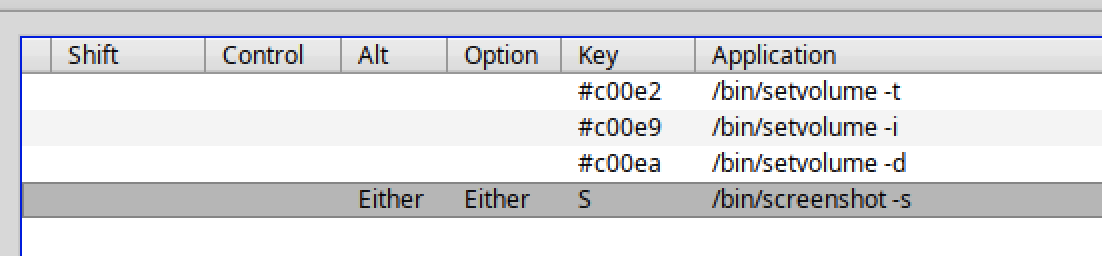
In order to avoid each type you hit the key "S" in the Terminal to call the Screenshot app, you need to indicate which additional key to use.
We will use the "Alt" + "Option" + "S" setting, for that click in the Alt area and Option area to make "Either" appear :
Then click on "save and apply" and close the Shortcuts app.
Well done !
Important note : don't use some standard shortcuts like "Alt" + "S" or "Option" + "S" which are generally used by applications to save a file.
That's why "Alt" + "Option" combination was used.
Next time you will hit your "Alt" + "Option" + "S" shortcut, the Screenshot application will appear to let you do your favorite screenshot :)
Eh wait...
I want to do the screen capture directly without opening the Screenshot GUI, is it possible ?
The answer is... Yes!
In the Terminal type :
screenshot -h
Screenshot [OPTIONS] [FILE]  Creates a bitmap of the current screen

FILE is the optional output path / filename used in silent mode. An existing
file with the same name will be overwritten without warning. If FILE is not
given the screenshot will be saved to a file with the default filename in the
user's home directory.

OPTIONS
  -m, --mouse-pointer   Include the mouse pointer
  -b, --border          Include the window border
  -w, --window          Capture the active window instead of the entire screen
  -d, --delay=seconds   Take screenshot after the specified delay [in seconds]
  -s, --silent          Saves the screenshot without showing the application
                        window
  -f, --format=image    Give the image format you like to save as
                        [bmp], [gif], [jpg], [png], [ppm], [tga], [tif]
  -c, --clipboard       Copies the screenshot to the system clipboard without
                        showing the application window

Note: OPTION -b, --border takes only effect when used with -w, --window
As you can see there's a silent option for the /bin/screenshot command (I don't know why there are two different executables "screenshot" and "Screenshot" today in Haiku).
Replace in your previous shortcut the below command and the job will be done :
/bin/screenshot -s
Compared to the Terminal, the Shortcuts application will not use the $PATH variable to search for executables, so it's required to indicate the full path for the executable you're calling.
It means, in the Terminal "screenshot -s" or "/bin/screenshot -s" will be recognized, whereas in the Shortcuts application only the "/bin/screenshot -s" can be used.
Now you can explain to your friends, you're mastering the art of print screen under Haiku :)